Wednesday, October 19, 2011

Pizza: French Bread Edition

Pizza, the Italian invention, has now become a staple in our food culture.  Far from the 'fast food' delivery choices, the 'Artisinal' pizza has taken over menus in all types of restaurants.  Here in San Francisco, we have a few higher end restaurants that focus mainly on pizza (Delfina, A16, Cotogna, just to name a few).  However, this post comes at a more pedestrian level for the classic dish.  For a few years now I have offered French Bread Pizzas to my clients as a great way to feed their kids.  Kids love pizza, kids love french bread pizza.  For me, it was a throw back to my age-group swimming days, where I would pine after the Stouffer's microwaveable french bread pizza, and enjoy it like it was my last meal as a 9 year old.  I've since then elevated my tastes above the microwave offering, and now I make my own with sauce from scratch, and a variety of toppings depending on my mood.
It was a sunny Sunday following an epic weekend filled with airshows, late nights, and a wedding.  I had oddly been craving pizza at a higher level than usual, and was considering all options on how I was going to get my fix.  After some light discussion with Darcy, I rang my buddy Juice (his mother calls him Justin) and he had suggested home-made pizza.  Suddenly, I became very motivated.  I had a ton of pizza ingredients in my pantry and fridge.  I had all the fixings to make a great sauce, 3 types of cheese, 2 types of pork, and fresh herbs. This was shaping up to be a fabulous meal.  There were some missing items, like pizza dough, so there had to be a Whole Foods run.  Darcy was a trooper and battled the Sunday crowds on the pizza mission put in front of her.  However, Whole Foods had run out of pizza dough.  Well, it actually turned out to be quite a convenience.  I had, literally 2 minutes prior to receiving notification that there was no pizza dough, explained to Juice that an awesome, easy meal was french bread pizza.  So, Darcy grabbed two loaves of Ciabatta bread and we were on our way to a fabulous meal.
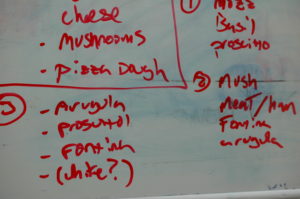
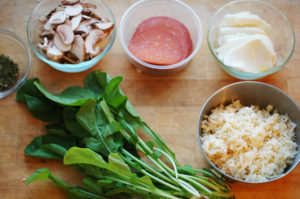
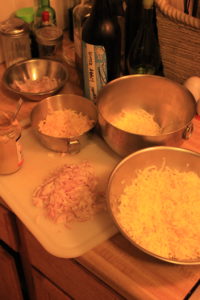
The great thing about the bread option, is you can easily create individual pizzas tailored to all of your cravings.  We went to work.  I knew I would have at least 3, maybe 4 creations, so I wanted to build different flavors into each and every one.  One with fresh mozzarella, proscuitto, and some beautiful arugula. Followed by a smoked mozzarella with pepperoni and mushrooms. Fontina, prosciutto, and garlic topped with fresh arugula and olive oil. We were all giddy and excited about each and every pizza we made.  Jealous of others, but stingy about sharing a bite of our own creation, this was truly a fabulous Sunday eating adventure.  The best part was how EASY it is.  If you are lazy, feel free to buy jarred sauce, but tomato sauce from scratch is very easy.  Cans or fresh tomatoes, its easy.  Buy some bread, cheese & a topping or 2 and you'll have an awesome, nostalgic meal.

Method

Preheat oven to 400*
Sauce
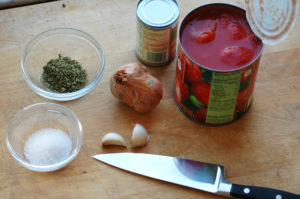
Saute garlic, and onions in a sauce pan with a little olive oil until onions are translucent.  Add the tomatoes and tomato paste, along with the oregano and a healthy pinch of salt (note: when adding tomato paste, usually a small amount of water is added as well).  Stir and heat over medium to low heat for about 30 minutes.  You can either serve as is, or blend it using an immersion blender or food processor.
Wednesday, October 5, 2011

Blue Moon Recipe: Winter Abbey Ale Mac n Cheese

About 7 months ago, my good friend Kate had called to discuss Blue Moon's Holiday variety pack and a complete Holiday Meal to go along with the sampler of beer. During the discussion of building the meal, I had brought up the idea of using one of the beers in the recipe for a version of mac and cheese.  Kate and the team were pretty enthusiastic about the idea, but it wasn't the right fit for the Holiday Meal.   So, the idea was tabled but not forgotten.  About two months ago, there was a call for another Winter Abbey Ale recipe. I referred to some of my notes and saw that this was the beer I was going to use for the mac and cheese.  This was easily approved and excitement on both sides was building.  Over some drinks with the team in Chicago, I brought up the discussion of which cheeses  might pair well with the beer.
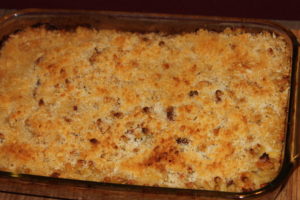
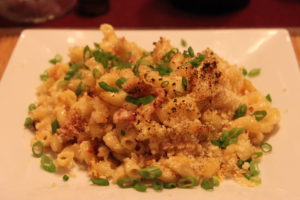
Cheese and Beer pairings are becoming more and more popular and a number of San Francisco restaurants are offering this idea as well as using beer in cheese based dishes.  The Winter Abbey Ale has some great nutty flavors along with dark roasted malts, which invites a number of different cheeses to the recipe.  Cheddar, Gruyere, Fontina, American, and Swiss were all discussed heavily.  But, I wanted something a little different.  After trying the beer a second time, my mind moved towards a creamy, nutty cheese.  I landed on Gouda.  When it came time to create the recipe, I ended up with three different cheeses; New York White Cheddar, Fontina and Gouda.  I thought this was a pretty solid mix, and would work well with the flavors of the beer. The fun part would be seeing how the beer would fit in with all of the other flavors going into the dish.  I started with bacon (I mean, lets be serious, you can't have mac n cheese without bacon!) and shallots, and let those cook down until the fat was rendered and the bacon was crispy.  Here is where I used the beer. I deglazed the pan with about a cup of Winter Abbey Ale, along with a large tablespoon of Dijon mustard.  It was smelling great, and the consistency of the mixture was perfect.  The cheeses, cream and some seasonings were added and stirred until smooth and then mixed with the al dente pasta.The anticipation was growing, beer was poured, and the smells out of the oven were fantastic.  Finally it was ready.  My guests dug in and were serving themselves heaping portions, I smiled.  The mac and cheese was superb. At first bite you can taste all the wonderful cheesiness and salty bacon. The cool part was after a few bites and long tasting chews, I could definitely taste the beer.  The subtle bitterness that comes from hops, and the roasted malt flavors were shining through.  A wonderful flavor enhanced by the cheese.  Look out wine, beer and cheese are here to stay!

Method

Preheat oven to 400*
Bring 8 cups of water to a boil. Add 1 pound of Macaroni to the pot.  Follow cooking instructions on the box to cook “Al Dente,” should be about 6 minutes. Strain and run under cold water to stop the cooking process. Set aside until the cheese mixture is ready.
In a separate pot, cook bacon pieces on medium to high heat.  Once the bacon is almost cooked to crispy, add the shallots in.  Cook the bacon and shallot mixture until the shallots become translucent, about 3-4 minutes.  Add the WAA and Dijon mustard. Then add the cream and all your cheeses, stirring slowly to incorporate and melt all the cheese.  Cook over low to medium until all the cheese is melted together.  Season the cheese mixture with the white pepper and salt.
In an oven safe baking dish, transfer the cooked macaroni and spread evenly.  Then add the melted cheese mixture, fully mixing and incorporating it with the pasta.  Top with bread crumbs, and place into the oven for 15-20 minutes or until bread crumbs are golden brown.

Monday, October 3, 2011

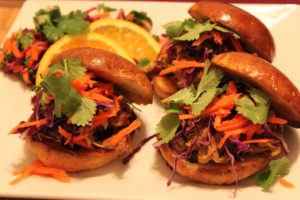
Grand Cru Pulled Pork Sliders

This particular Blue Moon recipe request came with a bit more weight and specialness to it.  Blue Moon releases its very special Grand Cru beer only during the holiday season, and it is only offered in larger magnum bottles.  I knew it was going to be special when I was given very specific tasting notes from the Brewmaster himself, Keith Villa.  The notes concentrated on the citrus tones and wheat flavor, prompting lots of ideas swimming through my head.  After some debate, the idea landed on sliders.  I wanted to move a bit away from the traditional slider approach, so I suggested pulled pork.  A heavily spiced pork, with some citrus braising liquid would pair nicely with Grand Cru. And with that nailed down, we were off an running.
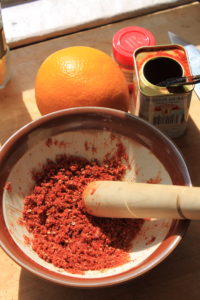
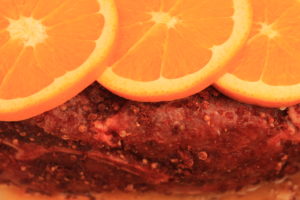
I wanted to add strong spices to the pork for its long journey in the oven, so I started with some garlic, coriander, smoked paprika, and ground mustard. From there I added brown sugar, salt, white pepper and some cayenne pepper. This was all combined in a mortar & pestal (mixing bowl is a perfect substitute), and then rubbed all over the pork.  Into the dutch oven it went, seared on all sides, then some apple cider vinegar and orange juice was added before it went into the oven.
Many hours later, the pork was ready to be "pulled." After a few pulls and a few tastes, I was pretty happy with the pork but it definitely needed a sauce.  I took the pan drippings and added a bit more sugar, vinegar, and let it reduce on the stove for a bit longer.  The sweet and acidic sauce was going to be a perfect compliment with the Grand Cru beer, accenting all of the citrus flavors.  Now, all that was needed was some toppings.
Moving away from traditional toppings, as well as a traditional slaw, I wanted to add some depth.  Carrots, red cabbage, and cilantro was my start.  Using the Vietnamese Bahn Mi sandwich as inspiration, I also added some fresh jalapeno slices to the slaw base.  Instead of using mayo, I kept this slaw light by adding a touch of apple cider vinegar, honey and some olive oil.  Lightly tossed together, this was a refreshing compliment to the savory pork, the slaw also added some great texture to the slider.
The dish came together nicely, great flavors, textures and colors.  A very fun spin on sliders, and paired very well with Grand Cru!

Method


Preheat oven to 250.
Combine all dry ingredients (garlic, paprika, sugar, salt, pepper, coriander, mustard, cayenne), into a bowl and mix well (mortar & pestle if you have one).  Take dry ingredients and rub shoulder generously.  Coat all sides.  Meanwhile, heat a Dutch oven on the stove-top (or oven safe baking dish with a lid) with a tablespoon of vegetable oil oil. Place seasoned pork shoulder into the pot and sear on all sides (2 minutes a side). Then add the OJ & Cider vinegar to the pot.  Cover and place into the oven for about 4 hours.  Internal temperature should read around 170-190 in the thickest part, and the meat should be falling off the bone.  Once the meat is at this state, remove from the pot into a bowl for shredding.  With 2 forks “pull” the pork apart into long strands, discarding any excess fat or inedible pieces.  Save any excess liquid for sauce.
Pulled Pork Sauce
The ideal sauce starts with the liquid left over in the pot from the slow roasting process.  The recipe items below are additions to that cooking liquid.  If there isn’t any liquid remaining, or if one wants more sauce, start with 1 cup of OJ and 1 cup of Apple Cider vinegar and begin reducing along with the following items.
1 tbsp Dijon mustard
2 tbsp Brown Sugar or Honey
2 Cloves
Pinch of salt