Friday, November 18, 2011

Blue Moon Fish Tacos

CHECK THIS POST OUT ON MY NEW SITE!!

This post comes a bit late for the project it was intended, however the result is still delicious.  Blue Moon asked me to create two spice rubs for nation wide distribution in 1/2 ounce packets.  Along with the spice rub creation there is a recipe that is attached with it. This one in particular is for their Summer Honey Wheat Ale.  A light and refreshing beer with some subtle notes of honey and citrus.  The spice pack has some nice complementary bold flavors that pair well with the beer.  Smoked paprika, brown sugar, ground mustard, salt and just a touch of cayenne pepper make up the majority of the spice pack.  The challenge on this particular recipe was to come up with a seafood dish they could use to promote a value offer with the beer.  After much debate, a white fish was agreed upon and the recipe was ready to be built.
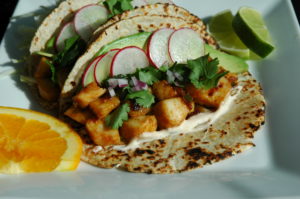
I decided to do a refreshing version of fish tacos, using the spice pack as my main flavoring tool.  Instead of deep frying the fish in a beer batter (which would be easily done and play very well with the beer), I went with a quick pan fry with the seasoning acting as the breading.  I also added a bit of lime zest and some fresh orange juice to add depth and a bit of 'pop' to the fish.  The fish was tilapia, a nice white fish that has nice texture and can stand up to different types of cooking, and also makes for delicious tacos. The dish wasn't quite complete, even though there was an array of toppings to choose from. Most fish tacos I've encountered has had a very subtle white sauce that really ties the taco together and has you craving more.  I decided to use the remainder of the spice pack to help make my faux white sauce.  Starting with a sour cream base, I added the remainder of the spice pack, some lime zest and juice.  I felt like I needed to add more, but when I tasted it, it was perfect.
This is a fun and very easy twist on fish tacos. Be on the look out for the spice packs in 2012!

Method

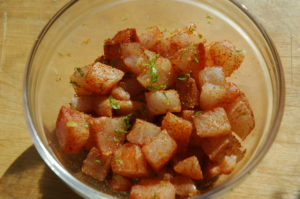
Cut Tilapia into ¼ inch cubes or there about. In a medium sized mixing bowl, take ½ the SHW spice packet and coat the pieces of fish along with 1 tsp of fresh lime zest. Toss well until all pieces of fish are coated, and set aside for cooking.
In a small bowl combine the sour cream, remaining lime zest, lime juice and the remainder of the spice pack and mix well until all ingredients are combined. Add salt or sugar if desired.
In a large skillet, heat 1 tbsp of vegetable oil then add the red onion and jalapeño. Sauté for a few minutes until onions become translucent.  Then add fish and sauté with the onions and peppers. Keep the fish moving around in the pan so they don’t stick and all flavors combine. After 2-3 minutes, add the juice of half an orange and continue to sauté for another 2-3 minutes then remove from heat and get ready to assemble.
Assembly:
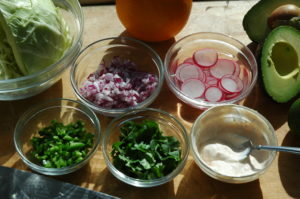
Take small spoonful of the sour cream mixture and spread it on the bottom of your tortilla. Add fish on top of this, followed by cilantro, radish, cabbage and avocado.  Garnish with fresh lime and extra sour cream sauce. Makes 4 tacos.
Wednesday, October 19, 2011

Pizza: French Bread Edition

Pizza, the Italian invention, has now become a staple in our food culture.  Far from the 'fast food' delivery choices, the 'Artisinal' pizza has taken over menus in all types of restaurants.  Here in San Francisco, we have a few higher end restaurants that focus mainly on pizza (Delfina, A16, Cotogna, just to name a few).  However, this post comes at a more pedestrian level for the classic dish.  For a few years now I have offered French Bread Pizzas to my clients as a great way to feed their kids.  Kids love pizza, kids love french bread pizza.  For me, it was a throw back to my age-group swimming days, where I would pine after the Stouffer's microwaveable french bread pizza, and enjoy it like it was my last meal as a 9 year old.  I've since then elevated my tastes above the microwave offering, and now I make my own with sauce from scratch, and a variety of toppings depending on my mood.
It was a sunny Sunday following an epic weekend filled with airshows, late nights, and a wedding.  I had oddly been craving pizza at a higher level than usual, and was considering all options on how I was going to get my fix.  After some light discussion with Darcy, I rang my buddy Juice (his mother calls him Justin) and he had suggested home-made pizza.  Suddenly, I became very motivated.  I had a ton of pizza ingredients in my pantry and fridge.  I had all the fixings to make a great sauce, 3 types of cheese, 2 types of pork, and fresh herbs. This was shaping up to be a fabulous meal.  There were some missing items, like pizza dough, so there had to be a Whole Foods run.  Darcy was a trooper and battled the Sunday crowds on the pizza mission put in front of her.  However, Whole Foods had run out of pizza dough.  Well, it actually turned out to be quite a convenience.  I had, literally 2 minutes prior to receiving notification that there was no pizza dough, explained to Juice that an awesome, easy meal was french bread pizza.  So, Darcy grabbed two loaves of Ciabatta bread and we were on our way to a fabulous meal.
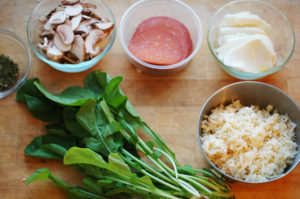
The great thing about the bread option, is you can easily create individual pizzas tailored to all of your cravings.  We went to work.  I knew I would have at least 3, maybe 4 creations, so I wanted to build different flavors into each and every one.  One with fresh mozzarella, proscuitto, and some beautiful arugula. Followed by a smoked mozzarella with pepperoni and mushrooms. Fontina, prosciutto, and garlic topped with fresh arugula and olive oil. We were all giddy and excited about each and every pizza we made.  Jealous of others, but stingy about sharing a bite of our own creation, this was truly a fabulous Sunday eating adventure.  The best part was how EASY it is.  If you are lazy, feel free to buy jarred sauce, but tomato sauce from scratch is very easy.  Cans or fresh tomatoes, its easy.  Buy some bread, cheese & a topping or 2 and you'll have an awesome, nostalgic meal.

Method

Preheat oven to 400*
Sauce
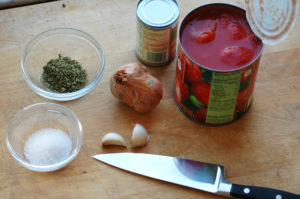
Saute garlic, and onions in a sauce pan with a little olive oil until onions are translucent.  Add the tomatoes and tomato paste, along with the oregano and a healthy pinch of salt (note: when adding tomato paste, usually a small amount of water is added as well).  Stir and heat over medium to low heat for about 30 minutes.  You can either serve as is, or blend it using an immersion blender or food processor.

Wednesday, October 5, 2011

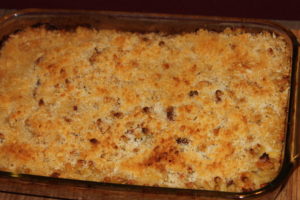
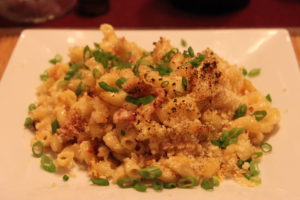
Blue Moon Recipe: Winter Abbey Ale Mac n Cheese

About 7 months ago, my good friend Kate had called to discuss Blue Moon's Holiday variety pack and a complete Holiday Meal to go along with the sampler of beer. During the discussion of building the meal, I had brought up the idea of using one of the beers in the recipe for a version of mac and cheese.  Kate and the team were pretty enthusiastic about the idea, but it wasn't the right fit for the Holiday Meal.   So, the idea was tabled but not forgotten.  About two months ago, there was a call for another Winter Abbey Ale recipe. I referred to some of my notes and saw that this was the beer I was going to use for the mac and cheese.  This was easily approved and excitement on both sides was building.  Over some drinks with the team in Chicago, I brought up the discussion of which cheeses  might pair well with the beer.
Cheese and Beer pairings are becoming more and more popular and a number of San Francisco restaurants are offering this idea as well as using beer in cheese based dishes.  The Winter Abbey Ale has some great nutty flavors along with dark roasted malts, which invites a number of different cheeses to the recipe.  Cheddar, Gruyere, Fontina, American, and Swiss were all discussed heavily.  But, I wanted something a little different.  After trying the beer a second time, my mind moved towards a creamy, nutty cheese.  I landed on Gouda.  When it came time to create the recipe, I ended up with three different cheeses; New York White Cheddar, Fontina and Gouda.  I thought this was a pretty solid mix, and would work well with the flavors of the beer. The fun part would be seeing how the beer would fit in with all of the other flavors going into the dish.  I started with bacon (I mean, lets be serious, you can't have mac n cheese without bacon!) and shallots, and let those cook down until the fat was rendered and the bacon was crispy.  Here is where I used the beer. I deglazed the pan with about a cup of Winter Abbey Ale, along with a large tablespoon of Dijon mustard.  It was smelling great, and the consistency of the mixture was perfect.  The cheeses, cream and some seasonings were added and stirred until smooth and then mixed with the al dente pasta.The anticipation was growing, beer was poured, and the smells out of the oven were fantastic.  Finally it was ready.  My guests dug in and were serving themselves heaping portions, I smiled.  The mac and cheese was superb. At first bite you can taste all the wonderful cheesiness and salty bacon. The cool part was after a few bites and long tasting chews, I could definitely taste the beer.  The subtle bitterness that comes from hops, and the roasted malt flavors were shining through.  A wonderful flavor enhanced by the cheese.  Look out wine, beer and cheese are here to stay!

Method

Preheat oven to 400*
Bring 8 cups of water to a boil. Add 1 pound of Macaroni to the pot.  Follow cooking instructions on the box to cook “Al Dente,” should be about 6 minutes. Strain and run under cold water to stop the cooking process. Set aside until the cheese mixture is ready.
In a separate pot, cook bacon pieces on medium to high heat.  Once the bacon is almost cooked to crispy, add the shallots in.  Cook the bacon and shallot mixture until the shallots become translucent, about 3-4 minutes.  Add the WAA and Dijon mustard. Then add the cream and all your cheeses, stirring slowly to incorporate and melt all the cheese.  Cook over low to medium until all the cheese is melted together.  Season the cheese mixture with the white pepper and salt.
In an oven safe baking dish, transfer the cooked macaroni and spread evenly.  Then add the melted cheese mixture, fully mixing and incorporating it with the pasta.  Top with bread crumbs, and place into the oven for 15-20 minutes or until bread crumbs are golden brown.

Monday, October 3, 2011

Grand Cru Pulled Pork Sliders

This particular Blue Moon recipe request came with a bit more weight and specialness to it.  Blue Moon releases its very special Grand Cru beer only during the holiday season, and it is only offered in larger magnum bottles.  I knew it was going to be special when I was given very specific tasting notes from the Brewmaster himself, Keith Villa.  The notes concentrated on the citrus tones and wheat flavor, prompting lots of ideas swimming through my head.  After some debate, the idea landed on sliders.  I wanted to move a bit away from the traditional slider approach, so I suggested pulled pork.  A heavily spiced pork, with some citrus braising liquid would pair nicely with Grand Cru. And with that nailed down, we were off an running.
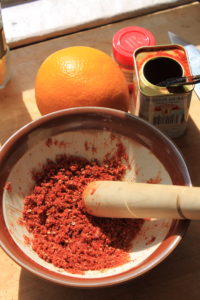
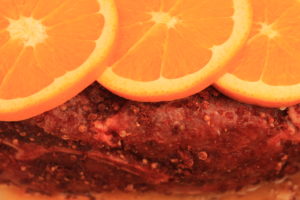
I wanted to add strong spices to the pork for its long journey in the oven, so I started with some garlic, coriander, smoked paprika, and ground mustard. From there I added brown sugar, salt, white pepper and some cayenne pepper. This was all combined in a mortar & pestal (mixing bowl is a perfect substitute), and then rubbed all over the pork.  Into the dutch oven it went, seared on all sides, then some apple cider vinegar and orange juice was added before it went into the oven.
Many hours later, the pork was ready to be "pulled." After a few pulls and a few tastes, I was pretty happy with the pork but it definitely needed a sauce.  I took the pan drippings and added a bit more sugar, vinegar, and let it reduce on the stove for a bit longer.  The sweet and acidic sauce was going to be a perfect compliment with the Grand Cru beer, accenting all of the citrus flavors.  Now, all that was needed was some toppings.
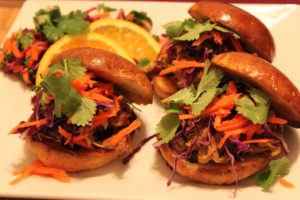
Moving away from traditional toppings, as well as a traditional slaw, I wanted to add some depth.  Carrots, red cabbage, and cilantro was my start.  Using the Vietnamese Bahn Mi sandwich as inspiration, I also added some fresh jalapeno slices to the slaw base.  Instead of using mayo, I kept this slaw light by adding a touch of apple cider vinegar, honey and some olive oil.  Lightly tossed together, this was a refreshing compliment to the savory pork, the slaw also added some great texture to the slider.
The dish came together nicely, great flavors, textures and colors.  A very fun spin on sliders, and paired very well with Grand Cru!

Method


Preheat oven to 250.
Combine all dry ingredients (garlic, paprika, sugar, salt, pepper, coriander, mustard, cayenne), into a bowl and mix well (mortar & pestle if you have one).  Take dry ingredients and rub shoulder generously.  Coat all sides.  Meanwhile, heat a Dutch oven on the stove-top (or oven safe baking dish with a lid) with a tablespoon of vegetable oil oil. Place seasoned pork shoulder into the pot and sear on all sides (2 minutes a side). Then add the OJ & Cider vinegar to the pot.  Cover and place into the oven for about 4 hours.  Internal temperature should read around 170-190 in the thickest part, and the meat should be falling off the bone.  Once the meat is at this state, remove from the pot into a bowl for shredding.  With 2 forks “pull” the pork apart into long strands, discarding any excess fat or inedible pieces.  Save any excess liquid for sauce.
Pulled Pork Sauce
The ideal sauce starts with the liquid left over in the pot from the slow roasting process.  The recipe items below are additions to that cooking liquid.  If there isn’t any liquid remaining, or if one wants more sauce, start with 1 cup of OJ and 1 cup of Apple Cider vinegar and begin reducing along with the following items.
1 tbsp Dijon mustard
2 tbsp Brown Sugar or Honey
2 Cloves
Pinch of salt

Tuesday, September 27, 2011

New Site!!

Hello fellow foodies! I'd like to thank you all personally for following my blog and reading up on what I'm creating in the kitchen.  Things have been going very well, and it was time to upgrade!!  All writings, postings, pictures are now LIVE on www.kellanskitchen.com!  I encourage you to bookmark, follow, and like it on Facebook so you don't miss any new posts, recipes or reviews!

Thanks, and I'll see you over on the new site!!

Wednesday, September 14, 2011

Hidden Gem: Dim Sum Alley

I love dim sum and I am always on the look out for a good pork bun or pot sticker.  Every time I order Chinese, I get pot stickers. My first dish during my visit to Japan, gyoza. I visit my local shop in Palo Alto religiously (Cho's!). Recently, I've found my new spot in San Francisco. Keith came to town from Healdsburg and was set on getting something Asian for lunch.  We were on our way to this Vietnamese sandwich shop in the Tenderloin, when Keith suddenly proclaimed "I could do some Pork buns too..." Keith had lived in SF for years and has uncanny knowledge of hole-in-the-wall eateries.  He had been boasting for years about the pork buns at his spot "deep into Chinatown."  I jumped at the opportunity to have him show me 'his spot' for dim sum.

After a tenuous bus ride on the 1, we arrived in the heart of Chinatown (Stockton & Clay).  It was a rare departure from the bus at this stop, usually I'm continuing on to the Financial district.  Keith hopped off and headed straight for an alley, adjacent to the bus stop.  On our quick walk, we passed the underground mahjong halls, where old Chinese folk were gambling away.  Stares from inside the halls in our direction were fiercely territorial, translating into something along the lines of "you better know where you're going, white boy." Slightly intimidating but very exciting because I knew this place had to be good.  We arrived quickly at our destination, Hang Ah Tea Room.


With the dining room slightly populated, we took our seats.  I let Keith drive the order.  Patiently waiting, we salivated as we saw plates of pork buns, crispy shrimp balls, and some other unidentified dishes float around the room.  And then our dishes came.


First was the crispy shrimp balls.  Amazingly flavorful, not rubbery ground shrimp crusted with perfectly crispy rice wraps.  Sauced with sweet & sour, soy & the house made spicy bean paste, these balls of shrimp were outstanding.


Then came the pork buns.  Beautiful white fluffy pillows filled with savory & sweet bbq'd pork.  Some of the best I'd ever had.  Then the pot stickers. Perfectly crispy and savory. Love in every bite.  Accompanied with the egg rolls, this was heaven.  We mopped up every last bit of everything that was on our table, and almost ordered more.  

This place is extremely legit, and I will be returning on a very regular basis.  Oh, and its cheap. $2.10 for pork buns, and $2.75 for pot stickers.  Don't spread the word, I'd like to keep prices down! So, be greedy, be secretive, and don't bring your co-workers to lunch.  Let them go to the big name places...

Wednesday, September 7, 2011

Rib. Fest. 2011.


Its not often that I write about something not created in my kitchen. However, this event deserves its own post and may inspire more like it to follow.  Every Labor day weekend (Wednesday-Monday) Sparks, Nevada is home to the largest Rib Cook Off west of the Mississippi, and considered by many to be one of the most prestigious wins amongst the very competitive BBQ circuit. 
 

This was to be my second visit to this event.  With lessons learned from last year, our hotel room at the Nugget was booked, Budweiser cans filled our back pack, and the all important white t-shirt was donned as patriotically as possible. I was wearing an old Tony Stewart NASCAR shirt. I was ready.  As we made our way out of the casino on to the strip of rib vendors, everyone's excitement was visible.  Where do we start? What's our rib ordering strategy? Someone pass me a beer! We conveniently found ourselves next to a respectable vendor blasting great music. Why not start here?  There were 8 of us in our party, so rib ordering had to be done strategically.  Portions were sold in 3 ribs, 6 ribs (1/2 rack) or 13-14 ribs (whole rack).  
Our general strategy was variety. Try to pack as many different rib vendors in as we could.  So, we embarked on our pork filled journey with Porky 'n Beans.  An excellent first choice to kick off Rib Fest.  The ribs were tender but not too fatty. The meat fell off the bone, and the sauce was bold and a great balance of sweet & spicy. This place set the bar high.  

On to the next joint!  Last year we stumbled upon BourbonQ, which  was our favorite at the time.  This Kentucky style rib was delicious and had, hands down, the best sauce at the competition in our eyes.  Luckily, BourbonQ was only a few steps away from where we had just devoured our first set of ribs.  The excitement was growing. There are some great ways to pick out who has great ribs at Rib Fest. One of which is how long the lines are. If there is a bottle neck in the street, chances are that the cause of the mass of people are tasty ribs.  BourbonQ was no exception.  The line was probably the longest we would wait in.  With a large banner stating "World Invitational Rib Champions" and a t-shirt stand selling shirts promoting pork consumption, BourbonQ lived up to the hype and our expectations.  Probably the best part of BourbonQ is the sauce.  There are 3-4 different types you can pile on to your already sauced ribs, but the flagship sauce, "Fighting Cock," was my personal favorite; spicy, tangy, sweet, and bold. Our team devoured the ribs so fast I couldn't snap a photo!  BourbonQ had an early majority vote as the favorite.

Next door to BourbonQ was a national brand, and boasted a trophy table that was intimidating. Kinders BBQ claimed it had the best sauce year in and year out.  We would be the judge of that.  The line was shorter than BourbonQ so we had ribs in hand in record time.  There were two sauces present, one a garlic based, the other a more smokey and bold mixture.  The rib meat fell off the bone, but fell well short of our previous two.  We knew right away that this joint was no where near the caliber of the first two.  
Moving on.  From my previous visit to Rib Fest, there was a vendor that I particularly loved.  It was a Memphis style rib which, I believe, was the only vendor to promote a dry rub.  I remembered that these ribs had a ton of flavor that the others didn't, and sauce wasn't necessary... not something you see much, especially at Rib Fest. So, I led the pack down to the end of the street where Willingham's stood tall and regal. There a couple things that every BBQ tent has; Huge banners promoting their specialties, large #1st Place signs, and a collection of trophies from various BBQ events.  Willingham's was no exception, however it lacked a trophy table.  Odd considering the list of 1st place awards flanking its massive banners.  But, as you approached the window there was a 8'x4' banner containing a picture of all of their trophies.  They were so confident they didn't feel the need to travel with their trophies, so they took a picture instead. Awesome. 

Darcy was at my side driving our order through... "If you think that these are gonna be good, let's get a full rack." After a slight hesitation, I couldn't deny that logic.  "A full rack, please."  The lady at the register yelled out "Full!" and rang a cow bell.  Again, awesome.  We saw our man by the BBQ pull off a huge full rack of baby back ribs, and slice them right in font of us.  

We waited patiently and excitedly.  Greedily, we grabbed our styrofoam container and headed to the sauce station.  Lathered up one side of the container with both sauces and joined our team.  At first bite I was lost in goodness.  I remember hearing a lot of grunting, moaning, and more grunting.  The full rack was the call of the day.  Everyone wanted more. More grunting ensued, followed by sauce licking, and then finished with beer drinking.  The dry rub style ribs, in my mind, brought a ton of flavor into the ribs that no other had done yet.  The more you chewed, the more flavor you tasted.  Combined with the bold & smokey or sweet & sassy sauce, the ribs were out of this world good.  

This easily became my favorite, and I think some other team members were convinced as well.  I was stoked to have a 2nd and half of a 3rd rib.  Finished off with a rib cheers, a beer cheers, and some stomach stretching, we moved on...


As the team left Willingham's smiling and happy, we agreed we needed to slow down a bit.  We had done 4 vendors in about 30-40 minutes.  Our walk slowed to a saunter as we took in the sites and paused at the incredible opportunity to people watch.  This was certainly an event people traveled too. As we strolled down the strip, the decision was upon Jerry on where to eat next. He landed on a Texas vendor.  At this point, we hadn't tasted anything from the famous BBQ state.  The vendor looked like a good choice and had a man in a cowboy hat BBQing right on the street, a good sign.  

The ribs were ok. Nothing like Willingham's, BourbonQ, or even Kinders.  Texas quickly fell short. They were a bit too fatty, and didn't fall off the bone.  The sauce was ok, but again, nothing like the previous vendors.  Maybe we got a faulty rack, but Texas just wasn't that good.  

By this point we were getting pretty full and happy, but there was still room for more.  A couple more beers, and a few more paces we stumbled onto Rasta Joe's.  A number of Tahoe people had recommended this place.  So, another order of ribs was bought.  Unfortunately, these ribs just weren't good.  Maybe it was because we had started with such high quality places, or maybe it was because we were getting full, but I barely finished one rib.  They were really fatty and chewy, almost like they had been boiled and then lightly grilled.  The sauces were uninspiring, but at least they had pickles!  I focused on my beer.  

All in all, Rib Fest was a huge success.  6 different vendors, and well over a full rack eaten, I was very satisfied and very full.  Darcy and I ended up going back to Willingham's for one last taste, and we were not disappointed.  If you haven't been to Rib Fest, you need too.  Not only are the ribs phenomenal, but the event itself is awesome.  Live music, competitive eating contests, and well, all the fun that Nevada boasts.  We ended our night dancing to an old man band and drinking whiskey inside of photo booths.  Thank you, Rib Fest. Ill see you again next year.


Thursday, September 1, 2011

Blue Moon Recipe: Spring Blonde Spice Rub Pork Loin

The summer projects for Blue Moon have been fun, challenging, and exiting to create.  This first recipe comes after a lengthy assignment developing spice rub packets for two of their seasonal beers. After many trials, a digital scale purchase, and some taste tests the spice rubs were chosen for development.  The 1/2oz packets will be distributed nation wide soon! So... with the spice rub packet comes a recipe!  

The Spring Blonde Spice Rub packet has some sharp flavors that were to be paired/sold with a value offer for oranges therefor this recipe had to call for fresh oranges.  When discussing with the team, I suggested since oranges and spices weren't that appealing on their own they be used as a marinade or sauce.  The Blue Moon team was into it and I ran with the idea.  I started with the 1/2oz spice rub (Celery salt, ground mustard, brown sugar, black pepper) and about 6 medium sized oranges.  I juiced all the oranges, but saved one of the rinds, and julienned that to add some more orange flavor into the marinade. I then built up the flavors by adding half a small diced jalapeno and then some chopped cilantro.  I tasted the marinade and it was running a bit acidic, so I added some honey. From there I knew I was close to something tasty. Adhering to the marinade rule (acid, salt, savory, fat) I added some olive oil, as well as some fresh lime juice for some punch.  This was looking and tasting good. I added the pork to this marinade and let it sit overnight in the fridge. 

The next day, I headed over to the Pollock house to finish this recipe.  Ali was roasting potatoes which would turn out to be a perfect compliment to the pork.  I pulled the pork out of the marinade and heated up a cast iron skillet until it was smoking then seared the loin on all sides.  The pork was then transferred to a baking dish along with just a touch of the marinade to keep the pork moist.  It went into a 400* oven for about 25 minutes.  I pulled the loins out when they hit 145*. They looked caramelized and delicious.  Once rested, I cut the pork loin into medallions and got it all ready to serve.  

It's always fun seeing people eat your food. The best compliments are not necessarily the verbal ones, but the physical acts of those getting up to get seconds and thirds... or Ali texting that she had the leftovers for lunch.  I love my job!

Keep an eye out for the spice rub packets in stores! The Summer Honey Wheat Spice Rub recipe will be on this space soon...

Spring Blonde Spice Rub Pork Loin
Ingredients:
1-    ½ oz Spring Blonde Spice Rub Packet
2 + pounds Pork Tenderloin
6 Oranges, juiced (yields 1 cup), + 1 rind chopped (or zest)
½ Jalapeño, small diced
¼ bunch of cilantro, chopped
2 limes, juiced
1/4-cup olive oil + 1 tbsp
2 tbsp honey
1 Red onion, halved, then sliced into 1/8 inch slices

Method:
In a bowl, combine all ingredients except the pork loin and red onion.  Mix well. Transfer into marinating dish with pork. Let sit over night.
Cooking process: Heat cast iron skillet on medium until smoking.  Add a tablespoon of olive oil to the pan and coat.  Place marinated pork tenderloin in skillet and sear each side (2-3minutes a side). Once all sides are seared, transfer to an oven safe pan with the red onion slices and place into a 400* oven for 25-30 minutes (or until internal temperature is 145*).
Meanwhile, place remaining marinade in a saucepan and heat on medium until simmering, this is heating the marinade through. 
Once pork is cooked, let it rest for 5 minutes before serving.  Slice into medallions and serve with warmed marinade.  Serves 3-4.


Tuesday, August 23, 2011

Tequila-Grapefruit Shrimp, Roasted Corn & Avocado Salad, Fennel Basil Calamari


Apologies up front for the delay between blog posts, it's been a busy summer! But these new ideas are sure to bring some inspiration to the table.  Summer is rapidly turning into fall and I wanted to make sure that I had some new ideas in the books before my mind switched into squashes, turkey, and savory dishes.  I had been itching to do some experimenting for a while and a recent journey to LA brought on the chance to play in a kitchen. In the events leading up to a Saturday night meal with my dear friends Kenny, Erica and their newest addition little Rowan, shrimp had been on my mind.  My friend Axel had mentioned something with tequila might be fun and interesting, so I took it and ran.  

It was a tough go at Whole Foods with no real dish in mind, so a lot of browsing through the local produce helped drive the dish.  I started with the shrimp. Limes, peppers/chilies, and cilantro is where I started, then I found some Grapefruits and that was the beginning of something good.  The dish came together like this: Tequila, fresh squeezed grapefruit juice, cilantro, garlic, agave nectar, diced sweet peppers, and salt marinaded the shrimp. They were then skewered and grilled. Topped with supremes of grapefruit and sliced avocado.  The perfect bite; a shrimp, a supreme of grapefruit, and a slice of avocado. Delicious and perfect for summer.

To accompany the shrimp a few other dishes were constructed.  At the store we also ran into some awesomely fresh calamari.  Wanting to do something a bit different and out of the box, I again found myself stuck in the produce section.  I came across some beautiful fennel and my mind went to Sicily where I had seen calamari & fennel paired.  I grabbed some lemons, and remembered that Kenny had oodles of fresh basil growing in his garden.  The calamari was cut into rings, the fennel diced in to the same shape along with diced fennel frawn.  I added some thin slices of red onion, fresh lemon juice & zest, and a touch of agave nectar.  This concoction was sauteed very quickly in some olive oil.  It was pretty delicious upon first bite, but was definitely missing something.  After some debate, we came to the conclusion that this needed pasta.  Keeping the idea, but it's not quite there yet.  

Onto what turned out to be the star of the show.  I have made roasted corn salad in the past, but none quite like this.  With fresh corn roasting on the grill, I sliced up some beautiful radish and fresh cilantro.  Then I added some roasted pine nuts, and large chunks of avocado. Lastly, I grilled some green onions and diced up the char and threw it in to the colorful bowl.  Finished with some high quality olive oil, red wine vinegar, and a pinch of salt, this salad was hands down the best dish of the night.  You can expect to see this pushed on all my summer offerings!

The meal was completed with some cous cous and roasted peppers. A perfect starch to accompany all the flavors on the plate.  There was a ton of vegetables, herbs, and fruit making this a very healthy summer meal.  Thanks Kenny, Erica & Rowan for having us!!  

Monday, August 8, 2011

Slider Night, Edition 1


It was a Tuesday night and I was sitting around the house talking with my roommate Amy.  We were in separate rooms carrying on a loud conversation about what we wanted for dinner. I started listing things I had in the fridge, and she was firing off ideas and verdicts on my proposals.  The menu suggestions went from tacos, to meatloaf, to burgers.  Someone mentioned sliders, and we both paused and quickly agreed.  We assembled and made the quick trek to Whole Foods to gather ingredients.  From just a small thought, came a mountain of fun ideas.  We weren't going to make just one style, we were gonna create 3-4 different sliders.  It was time to play. 

First and foremost we had to do a classic.  I had some delicious black forest rubbed bacon, and sharp cheddar cheese.  With the addition of caramelized onions and a srirracha ketchup, that one was finished.  Easy.  

The second one that came to mind was using goat cheese.  We decided to put an heirloom tomato slice, and some crispy shallots.  In addition, we agreed it would need a sauce. Keeping on the garden theme, a roasted garlic aioli was to be constructed. A couple leaves of spinach and this one was ready.  

The third one took some time to get right, but we were very excited about it.  A roasted Anaheim chili would be the inspiration.  Pepper jack cheese would be melted, and a south western aioli would be the sauce that bound everything together.  This one was mouthwatering. 

And the final and fourth slider was tricky.  We both wanted something random and different.  As we wandered around the crowded grocery store watching all of the neighborhoodies get their organic produce, we landed in the seafood department.  Somehow we decided to get fresh dungeness crab.  It was discussed and decided that a crab salad would be made, and avocado to top the fourth slider.  We were excited. 

With the ingredients purchased, the hurricane of prep began.  Prepping four different sliders and all of the toppings proved to be an arduous task, but well worth it.  Drying and deep frying the shallots, making the crab salad, roasting garlic & the Anaheim pepper, and making homemade potato chips took about an hour and a half.  With the sauces were constructed and mini buns toasted, it was time to build.  The sliders began to tower as our mouths salivated.  Also a last minute dish was a crab salad with an orange vinaigrette and arugula was thrown together as a palate cleanser.  

After a few iPhone pics, we dove in.  All of the sliders were delicious, but we each had our personal favorites.  The goat cheese & heirloom tomato slider was my choice, and Amy leaned towards the roasted Anaheim chili & pepper jack creation.  There were definitely no losers in this battle.  Cant wait to do it again, this time for more than two people!  #slidertuesday.